星虎论坛

 找回密码
 马上注册

QQ登录

只需一步,快速开始

查看: 5757|回复: 0

音乐主题的特效墙纸Photoshop轻松做

[复制链接]
  • TA的每日心情
    郁闷
    前天 18:12
  • 签到天数: 32 天

    [LV.5]常住居民I

    发表于 2008-4-16 09:44:09 | 显示全部楼层 |阅读模式
    This lesson you'll see how is it possible to represent the wallpaper, having a photo only.
    这篇文章我们要学习如何将一片照片变成漂亮的墙纸。
                   
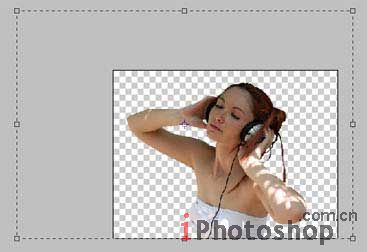
                    Open a girl photo for the beginning: File -Open (ctrl+o)
    点击文件-打开,打开一张照片~可以自己拍一张~:)


                    Using Polygonal Lasso Tool, mark it out along its contour.
    使用多边形套索工具将MM抠出来。


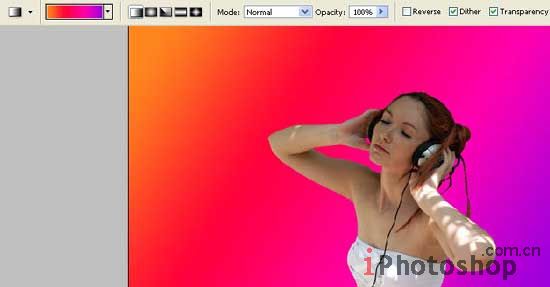
                    Then cut it out (Edit -Cut (ctrl+x)) and insert it on a new layer: Edit -Paste (ctrl+v). The layer containing the rest of the picture must be deleted (Layer -Delete - Layer). Apply next step the Crop Tool and enlarge the illustration size to have enough place for the background.
    点击编辑-剪切(ctrl+x),新建一个图层,点击编辑-粘贴(ctrl+v),余下的部分可以删掉了~接下来使用裁剪工具将画布扩大。
                   
                                   
      Create now a new layer: Layer -New Layer and place it on the bottom, just clicking on it and move it on the necessary place. After that, paint it, using the Gradient Tool.
    新建层,放置在最下面作为背景,使用渐变工具填充,颜色选亮一点的~


                    Get back to the girl layer processing. Correct the brightness, contrast and the color, using next combination: Image -Adjustments -Curves (ctrl+m).
    回到MM图层,点击图像-调整-曲线(ctrl+m)将画面颜色修正~参数如下:


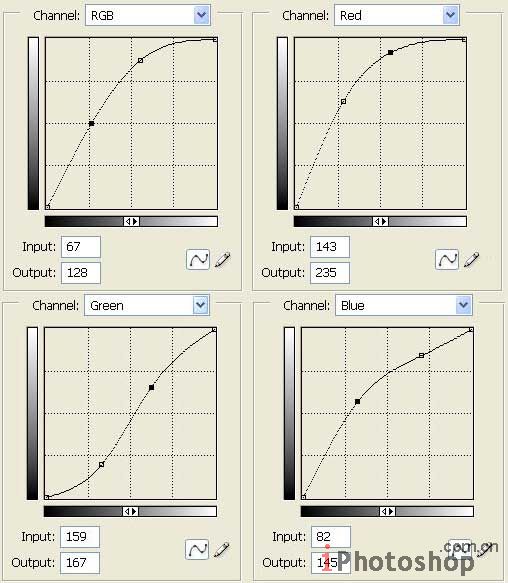
                    We got such a picture:
                   
    效果如下:
                                   
                   
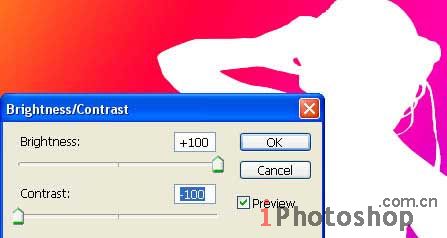
                    Copy then the layer that we got: Layer -Duplicate Layer and make the girl picture totally white, applying next selection: Image -Adjustments -Brightness/Contrast.
    复制层,将MM变成彻底的白色,点击图像-调整-亮度/对比度,如下设置:
                   
                                   
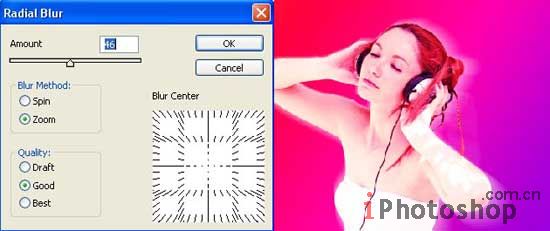
      Blur Place the last layer lower than the basic girl layer, using Filter -Blur -Radial Blur.
    将白色MM图层进行模糊(滤镜-模糊-放射模糊),并将白色MM层放到彩色MM层下面。


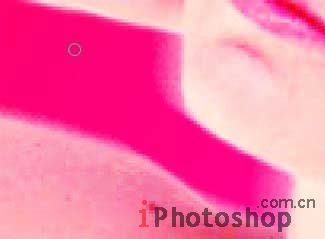
                    Then blur a little the outside picture contours with the Blur Tool.
    使用模糊工具将MM轮廓转角处进行一下模糊处理,使得MM可以更好得与背景融合。


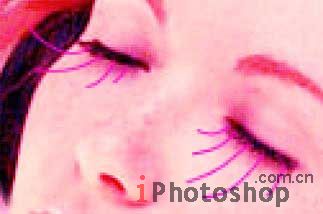
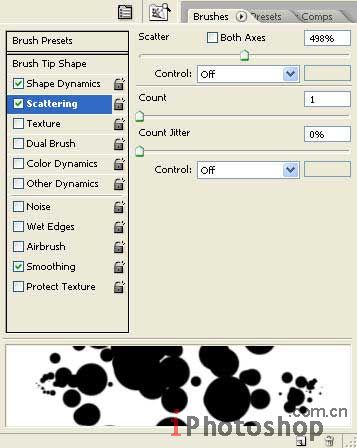
                    Use the Brush Tool for creating long eyelashes.
    使用画刷给MM画上几根漂亮的眼睫毛~


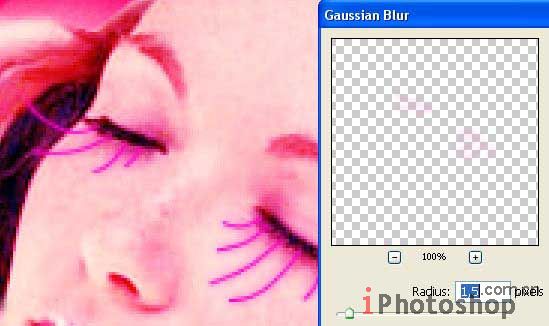
                    Copy the layer containing the eyelashes and blur out the copy, applying Filter -Blur -Gaussian Blur.
    复制MM睫毛层,将新层进行一下模糊处理(滤镜-模糊-高斯模糊)。
                                   
    Create now a new layer, above the girl one and put them in a group: Layer -Create Clipping Mask, but the future drawing must not get over the contours of the illustration. Next step includes taking the Brush Tool and picturing the flowers on the girl skin.
    新建层,放在MM层的上面,并将新层和MM层归为一组,点击图层-新建剪切蒙版,但是接下来的绘图不要绘制在MM的轮廓转角处。下面我们要在MM的皮肤上使用画刷画一些美丽的花花~


                    Change the layer type on Overlay.
    将花花图层的类型设置为覆盖。


                    Insert also several flowers on the background layer.
    背景层上也添加一些好看的小花花。
                   
                                   
      Choose a brush now having the butterfly ornaments form a standard brush set Special Effects Brushes.Then paint out above the background layer several butterflies ofdifferent sizes and different angles, but of the same color for thebeginning.


    再使用蝴蝶笔刷在背景处绘制一些漂亮的蝴蝶~颜色要和我们现在图片的颜色搭配哦~


                    Then choose a different color (on a new layer):
                   
    新建一层,换个颜色继续画小蝴蝶~
                                   
                   
                    Change the layer type with the lilac-colored butterflies on Linear Dodge. The yellow butterflies layer must be changed on Screen.
    把淡紫色小蝴蝶层的层类型设置为线性减淡,黄色蝴蝶层类型设置为滤色。


                    Get back to the Basic Brushes and choose a big size brush, changing a little its adjustments on the Brushes window.
    回到笔刷设置界面,选择一个大笔刷,并如下更改一下笔刷设置。


                    Picture now several wavy lines of white color.
    绘制一条波浪形的点线~如下:


                    Copy this layer, applying next command: Layer -Duplicate Layer and increase its size: Edit -Free Transform (ctrl+t). Place this layer lower than the basic one containing the bubbles and change the layer type on Overlay.
    复制层,将新层的尺寸变大一点(编辑-自由变换ctrl+t),将新层放在原始层下方,并将层类型设置为覆盖。
                   
                                   
      Pick now from the standard brushes set representing the stars the appropriate brush (it can be downloaded here: http://www.deviantart.com/deviation/30000107/?
                                            qo=20&q=by%3Aanarasha&qh=sort%3Atime+-in%3Ascraps
    ) and draw several stars around the girl.
    下面我们要在MM的周围添加一些星星的效果,可以通过下载星星笔刷来完成,地址为:(http://www.deviantart.com/deviation/30000107/?qo=20&q=by%3Aanarasha&qh=sort%3Atime+-in%3Ascraps


                    Applying the Crop Tool and Rectangular Tool, insert finally the necessary frame.
    如果有需要可以使用彩切工具扩大画布给图片加个框框~~~一个非常漂亮的梦幻桌面就完成了~~希望这篇文章你能喜欢^_^


    *滑块验证:
    您需要登录后才可以回帖 登录 | 马上注册

    本版积分规则


    qq群及公众号二维码

    QQ|小黑屋|手机版|Archiver|星虎 ( 黔ICP备05004538号 )|网站地图

    GMT+8, 2024-4-30 14:08

    Powered by Discuz! X3.4

    Copyright © 2001-2021, Tencent Cloud.

    快速回复 返回顶部 返回列表